
South Africa National Cricket Team vs Australian Men’s Cricket Team Timeline From 1902 – 2024
The rivalry between South Africa and Australia in cricket is one of the most intense and long-lasting in the sport’s history. It is marked by hard-fought contests, iconic performances, and unforgettable matches spanning over 120 years.
From their first match in 1902 to the ongoing battles in 2024, this cricketing timeline outlines how the two teams have evolved, shaping one of the most captivating rivalries in world cricket.
South Africa National Cricket Team vs Australian Men’s Cricket Team Timeline (1902 – 2024)
1. 1902-03 Australia Tour of South Africa
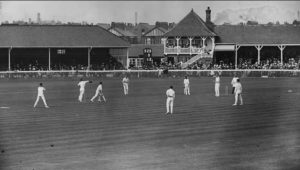
Image – Source
Number of Matches: 3 Test Matches
Series Result: Australia won 2-0
Test Series 2-0
1st Test: Johannesburg (October 11-14, 1902)
- Australia: 345 & 115
- South Africa: 144 & 158
- Result: Australia won by an innings and 158 runs
Key Performances:
The first Test of the series saw Australia dominate South Africa with a comprehensive victory by an innings and 158 runs. Australia’s first innings total of 345 was built on the back of captain Joe Darling’s solid 91 and key contributions from Clem Hill (68).
South Africa’s response was stifled by Australia’s strong bowling attack, led by Hugh Trumble, who took 7 wickets for 28 runs in the first innings. South Africa was bowled out for just 144.
Asked to follow on, South Africa fared no better in their second innings. Monty Noble’s all-round skills shone, as he took 6/17, decimating the South African lineup. Despite a valiant 46 from Dave Nourse, South Africa was bundled out for 158, leaving Australia victorious by a huge margin in the first match of the series.
2nd Test: Cape Town (October 25-28, 1902)
- Australia: 225 & 269
- South Africa: 150 & 250
- Result: Australia won by 94 runs
Key Performances:
The second Test at Cape Town was a much closer contest. Australia batted first and posted 225, with Victor Trumper playing a crucial role, scoring a quickfire 70. South Africa’s first innings saw them struggle to match Australia’s pace, with Trumble once again wreaking havoc, taking 5 wickets for 43 runs, restricting South Africa to 150.
Australia’s second innings saw contributions from Trumper again (59) and Joe Darling (43), setting a target of 345 for South Africa. Despite a fighting 78 from Jimmy Sinclair, South Africa fell short, bowled out for 250. Monty Noble took 4 wickets in the second innings to help Australia seal the series.
3rd Test: Johannesburg (November 15-17, 1902)
- Australia: 175 & 226
- South Africa: 159 & 180
- Result: Match drawn
Key Performances:
The third and final Test of the 1902-03 series ended in a draw, but it was a tightly contested match that South Africa nearly claimed. Australia batted first and was bowled out for 175, with South African bowlers Charlie Llewellyn and Bill Shalders sharing the wickets, taking 5 and 4 respectively. Victor Trumper top-scored for Australia with a composed 57.
In reply, South Africa managed 159, with skipper Louis Tancred contributing a gritty 44. Australia’s bowling attack, led by Monty Noble (5/44), kept South Africa from taking a significant lead.
Australia’s second innings saw them put up 226, with Clem Hill’s vital 72 helping them set a target of 243 for South Africa. South Africa’s chase was marked by determined batting from Jimmy Sinclair (65), but Monty Noble’s brilliant all-round performance (4 wickets) ensured that South Africa was bowled out for 180, just 63 runs short of the target when time ran out.
The match ended in a draw, with Australia winning the series 2-0.
2. 1921-22 Australia Tour of South Africa
Test Series: Australia won 1-0
1st Test: Durban (November 5-7, 1921)
- Australia: 450
- South Africa: 188 & 91
- Result: Australia won by an innings and 171 runs
Key Performances:
The first Test of the series saw Australia assert their dominance with an innings victory over South Africa. Australia batted first and posted a mammoth total of 450, thanks to a masterful century by Herbie Collins, who scored 157, and valuable contributions from Charlie Macartney (76) and Jack Gregory (58).
South Africa struggled in their response, with Gregory’s fiery pace proving too much for them. He took 6/58 in South Africa’s first innings, reducing them to 188.
Following on, South Africa collapsed for just 91 in their second innings, with Gregory taking another 5 wickets (5/36), completing a remarkable all-round performance. Australia wrapped up the match within three days, securing a commanding victory by an innings and 171 runs.
2nd Test: Johannesburg (December 10-14, 1921)
- Australia: 389
- South Africa: 296 & 185/4
- Result: Match drawn
Key Performances:
The second Test in Johannesburg was a much closer affair. Australia batted first, with Charlie Macartney scoring a fluent 109 and Collins contributing 82, helping Australia reach 389. South Africa responded strongly, posting 296, with Herbie Taylor leading the way with a gritty 109. Arthur Mailey was Australia’s standout bowler, taking 5 wickets for 89 runs.
In their second innings, Australia chose not to enforce the follow-on, and rain interruptions caused time to run out. South Africa batted steadily in their second innings, reaching 185/4 by the end of the final day, with Taylor again showing his class with an unbeaten 82. The match ended in a draw.
3rd Test: Cape Town (January 7-11, 1922)
- Australia: 346
- South Africa: 226 & 302
- Result: Match drawn
Key Performances:
The final Test of the series in Cape Town ended in another draw, but it was an exciting contest. Australia, batting first, posted 346, with a century from Warren Bardsley (121) and a well-played 87 from Jack Gregory. South Africa’s bowlers, particularly George Parker, bowled with great discipline to restrict Australia.
South Africa’s first innings saw them reach 226, with Dave Nourse making a valuable 77. Gregory continued his excellent series with the ball, taking 4 wickets. South Africa put up a stronger fight in their second innings, led by Herbie Taylor’s 93 and a solid 65 from Nourse. They ended with 302, but time ran out, and the match concluded in a draw.
Series Overview:
The 1921-22 series was marked by Australia’s clear superiority in the first Test and two closely contested draws in the second and third Tests. The standout performances came from Jack Gregory, whose all-round display, particularly in the first Test, made him the player of the series.
South Africa, while improving, couldn’t quite match the Australians, especially with Gregory’s devastating pace bowling.
3. 1931-32 Australia Tour of South Africa
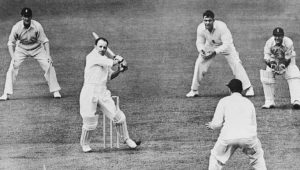
Image – Source
Test Series: Australia won 5-0
1st Test: Johannesburg (December 24-27, 1931)
- Australia: 450 & 190
- South Africa: 239 & 137
- Result: Australia won by 264 runs
Key Performances:
The series opened with a dominant display by Australia, who posted a commanding total of 450 in their first innings, largely due to a sparkling 151 by Bill Woodfull.
Jack Fingleton added valuable runs with his 86, helping Australia set a massive first-innings target. South Africa, in response, could only manage 239, with Eric Dalton top-scoring with 71. Clarrie Grimmett’s leg-spin wreaked havoc as he took 5/71.
Following on, South Africa collapsed for 137 in their second innings, with Grimmett again leading the charge, picking up 4 more wickets. Australia comfortably won the match by 264 runs to take a 1-0 lead in the series.
2nd Test: Cape Town (January 1-5, 1932)
- Australia: 439
- South Africa: 217 & 174
- Result: Australia won by an innings and 48 runs
Key Performances:
Australia’s second victory came through another impressive all-round performance. After scoring 439 in their first innings, thanks to a superb 157 from Stan McCabe and an aggressive 96 from Bert Oldfield, Australia put South Africa under pressure right from the start.
South Africa struggled against Australia’s disciplined bowling attack, with Alec Hurwood picking up 6/94, as they were bowled out for 217.
Forced to follow on, South Africa’s batting woes continued, managing just 174. Grimmett and Hurwood combined again to bowl Australia to an innings victory. This win gave Australia a 2-0 lead in the series.
3rd Test: Durban (January 15-18, 1932)
- Australia: 287 & 237
- South Africa: 160 & 215
- Result: Australia won by 149 runs
Key Performances:
In Durban, Australia maintained their stranglehold on the series. Batting first, they put up a respectable 287, with Stan McCabe contributing 86 and Woodfull adding 60. South Africa’s reply was poor, as they were bundled out for just 160, with Grimmett claiming 7/40 in a masterclass of leg-spin bowling.
In their second innings, Australia added 237 more runs, setting South Africa a daunting target of 365. South Africa showed some resistance through Bob Catterall’s gritty 87, but they eventually fell short, bowled out for 215. Australia claimed a 149-run victory to go 3-0 up in the series.
4th Test: Johannesburg (February 5-8, 1932)
- Australia: 453
- South Africa: 220 & 175
- Result: Australia won by an innings and 58 runs
Key Performances:
The fourth Test saw Australia continue their dominant run, posting a massive first innings total of 453, powered by a magnificent 169 from Bill Ponsford and a well-made 107 from Jack Fingleton. South Africa, in their reply, could only muster 220, with Grimmett once again proving unplayable as he took 6/97.
Following on, South Africa’s batting collapse was inevitable, and they were bowled out for 175, handing Australia an innings victory. Grimmett and Hurwood picked up three wickets each in the second innings, sealing a comprehensive series win for Australia.
5th Test: Cape Town (February 19-23, 1932)
- Australia: 275 & 371
- South Africa: 193 & 212
- Result: Australia won by 241 runs
Key Performances:
In the final Test, Australia completed a series whitewash with another commanding performance. After being restricted to 275 in the first innings, largely due to a disciplined bowling effort from South Africa’s Sandy Bell, Australia bounced back strongly in the second innings with 371.
Don Bradman, who had been relatively quiet in the series, finally came to the party, scoring a brilliant 167.
South Africa could only manage 193 in their first innings, with Arthur Chudleigh’s 52 the only bright spot. Facing a target of 454 in their second innings, South Africa collapsed once again to 212, with Clarrie Grimmett taking 5 wickets, ending the series with an astonishing tally of wickets. Australia won by 241 runs to complete the 5-0 sweep.
Series Overview:
The 1931-32 series was an absolute showcase of Australia’s dominance in world cricket, with their comprehensive 5-0 whitewash over South Africa. Clarrie Grimmett was the standout performer, taking wickets consistently in every match, and Bill Woodfull and Stan McCabe provided key batting contributions. South Africa struggled throughout the series, unable to cope with Australia’s aggressive pace and lethal spin bowling.
4. 1935-36 Australia Tour of South Africa
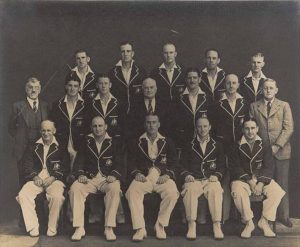
Image – Source
Test Series: Australia won 4-0
1st Test: Durban (December 6-10, 1935)
- Australia: 291 & 248
- South Africa: 192 & 214
- Result: Australia won by 133 runs
Key Performances:
The first Test in Durban set the tone for Australia’s dominance throughout the series. Australia batted first and posted a competitive total of 291, with key contributions from Stan McCabe (95) and Bill Brown (73).
South Africa’s response was below par, as they managed only 192 in their first innings. Bill O’Reilly’s leg-spin was unplayable, as he picked up 5/51 to break through South Africa’s batting lineup.
In their second innings, Australia added 248 more runs, setting South Africa a target of 348 to win. Despite a fighting 74 from Herbie Wade, South Africa was bowled out for 214, with O’Reilly taking another 4 wickets. Australia secured a 133-run victory to take a 1-0 lead in the series.
2nd Test: Johannesburg (December 24-28, 1935)
- Australia: 435 & 196
- South Africa: 157 & 291
- Result: Australia won by 183 runs
Key Performances:
Australia extended their series lead in the second Test with a commanding win. Batting first, Australia posted a massive 435, led by Bill Brown’s elegant 120 and a swashbuckling 103 from Stan McCabe. South Africa, in response, crumbled to 157, with Clarrie Grimmett’s spin proving devastating as he claimed 6/54.
Australia’s second innings wasn’t as dominant, and they managed 196, setting South Africa a near-impossible target of 475 runs to win. South Africa’s second innings showed some fight, with Bruce Mitchell’s resilient 97 and Eric Dalton’s 75, but they eventually fell short, being bowled out for 291.
Grimmett and O’Reilly again proved too difficult to handle, taking 4 and 3 wickets, respectively. Australia won by 183 runs to go 2-0 up in the series.
3rd Test: Cape Town (January 1-6, 1936)
- Australia: 511/6 declared
- South Africa: 228 & 273
- Result: Australia won by an innings and 10 runs
Key Performances:
Australia’s batting dominance was on full display in the third Test at Cape Town. After winning the toss and batting first, Australia declared on a mammoth 511/6, thanks to a brilliant double century from Bill Brown (206*) and a masterful 157 from Jack Fingleton.
In reply, South Africa was once again unable to cope with Australia’s spin attack. They were bowled out for 228 in their first innings, with O’Reilly continuing his fine form, taking 5 wickets. Forced to follow on, South Africa fared slightly better in their second innings, reaching 273, with Dudley Nourse’s 85 being the standout performance.
However, it wasn’t enough to avoid defeat as Australia won by an innings and 10 runs, sealing the series with a 3-0 lead.
4th Test: Johannesburg (January 24-28, 1936)
- Australia: 288 & 351/7 declared
- South Africa: 201 & 236
- Result: Australia won by 202 runs
Key Performances:
The fourth Test saw Australia continue their dominance and complete the series victory. Australia batted first and scored 288, with Stan McCabe once again leading the way with a composed 98. South Africa’s response was limited to 201, as O’Reilly took another 5-wicket haul (5/56), continuing his dominance throughout the series.
Australia’s second innings declaration at 351/7 gave South Africa a daunting target of 439 to win. McCabe contributed 83, while Arthur Chipperfield added 79. South Africa’s second innings was spirited, with Eric Dalton scoring 78, but they were bowled out for 236, falling 202 runs short.
Clarrie Grimmett picked up 4/71 in the second innings, ensuring Australia’s 4-0 series victory.
5th Test: Port Elizabeth (February 14-18, 1936)
- Australia: 294
- South Africa: 256 & 167/5
- Result: Match drawn
Key Performances:
The final Test of the series in Port Elizabeth ended in a draw, with weather interruptions playing a significant role. Australia batted first and posted 294, with Stan McCabe top-scoring yet again with 95 and support from Jack Fingleton’s 78.
South Africa’s first innings response was a solid 256, with Bruce Mitchell anchoring the innings with a well-crafted 94.
In Australia’s second innings, rain delays meant limited play was possible. By the time the game was called off, South Africa had reached 167/5 in their second innings, with Mitchell (56*) continuing his good form. Despite the draw, Australia had already secured a convincing 4-0 series victory.
Series Overview:
The 1935-36 series was a showcase of Australia’s dominance in both batting and bowling. Bill Brown, Stan McCabe, and Jack Fingleton shone with the bat, while Clarrie Grimmett and Bill O’Reilly’s spin partnerships consistently tore through South Africa’s batting line-up.
South Africa showed glimpses of fight, especially from players like Bruce Mitchell and Dudley Nourse, but they were ultimately outclassed by the Australians. Australia’s 4-0 series victory further cemented their status as one of the strongest cricketing teams of the era.
5. 1949-50 Australia Tour of South Africa

Image – Source
Test Series: Australia won 4-0
1st Test: Johannesburg (December 1-7, 1949)
- Australia: 258 & 183
- South Africa: 162 & 204
- Result: Australia won by 75 runs
Key Performances:
The first Test in Johannesburg marked the start of Australia’s dominance in the series. Australia batted first and managed 258, with Don Bradman scoring a crucial 66. South Africa’s response was modest, as they were bowled out for 162, with Ray Lindwall taking 5/39.
In their second innings, Australia scored 183, setting South Africa a target of 280. Despite a fighting 90 from Dudley Nourse, South Africa was dismissed for 204, with Lindwall adding another 4 wickets. Australia won by 75 runs to take a 1-0 lead in the series.
2nd Test: Cape Town (December 15-21, 1949)
- Australia: 362 & 328
- South Africa: 258 & 269
- Result: Australia won by 163 runs
Key Performances:
Australia extended their series lead with a commanding performance in Cape Town. Australia batted first, scoring 362 with Arthur Morris contributing 127. South Africa responded with 258, with Doug Ring taking 5/89.
In their second innings, Australia scored 328, with Bradman adding a superb 104. South Africa, chasing 433, put up a fight but fell short, reaching 269 with Nourse scoring 95. Ring and Lindwall were instrumental in dismissing South Africa, securing a 163-run victory to go 2-0 up in the series.
3rd Test: Durban (January 5-11, 1950)
- Australia: 314 & 174
- South Africa: 171 & 254
- Result: Australia won by 63 runs
Key Performances:
The third Test in Durban showcased Australia’s continued dominance. Australia batted first and scored 314, with Bradman making 77 and Morris 63. South Africa managed 171 in their first innings, with Lindwall claiming 5/41.
Australia’s second innings added 174 runs, setting a target of 318. South Africa fought back but was all out for 254, with Nourse scoring 90. Ring and Miller’s effective bowling ensured Australia’s win by 63 runs, taking an unassailable 3-0 lead in the series.
4th Test: Port Elizabeth (January 19-26, 1950)
- Australia: 404 & 136
- South Africa: 314 & 195
- Result: Australia won by 31 runs
Key Performances:
The fourth Test in Port Elizabeth was a tightly contested match. Australia batted first and scored 404, with Bradman making 119 and Morris adding 93. South Africa scored 314 in response, with Nourse scoring 87 and Bruce Mitchell 75.
In their second innings, Australia scored 136, setting a target of 227. South Africa fought hard but was dismissed for 195, with Mitchell contributing 76. Miller and Lindwall’s disciplined bowling ensured Australia’s win by 31 runs, completing a 4-0 series sweep.
Series Overview:
The 1949-50 series was a testament to Australia’s superior cricketing prowess. Don Bradman, despite being towards the end of his career, was pivotal, supported by Arthur Morris and a formidable bowling attack led by Ray Lindwall and Doug Ring.
South Africa showed resilience through players like Dudley Nourse and Bruce Mitchell but were ultimately outplayed by Australia. The 4-0 series victory underscored Australia’s dominance in international cricket.
6. 1952-53 South Africa Tour of Australia
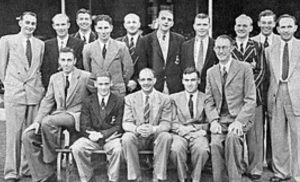
Image – Source
Test Series: Series drawn 2-2
1st Test: Melbourne (December 5-10, 1952)
- Australia: 381 & 188
- South Africa: 264 & 184
- Result: Australia won by 121 runs
Key Performances:
The first Test in Melbourne saw Australia take an early lead in the series. Australia batted first and scored 381, with a notable 115 from Ian Johnson. South Africa’s first innings saw them manage 264, with a solid 85 from Bruce Mitchell.
Australia’s second innings yielded 188, setting South Africa a target of 306 runs. Despite a fighting 72 from Dudley Nourse, South Africa was bowled out for 184, with Johnson taking 5/43. Australia secured a 121-run victory to lead the series 1-0.
2nd Test: Sydney (December 26-31, 1952)
- Australia: 377 & 238
- South Africa: 343 & 140
- Result: Australia won by 132 runs
Key Performances:
Australia continued their strong performance in Sydney. Batting first, they scored 377, with 139 from Colin McCool and a solid 87 from Neil Harvey. South Africa’s response was 343, with an impressive 110 from Nourse.
In their second innings, Australia scored 238, setting South Africa a target of 273 runs. South Africa fell short, being dismissed for 140, with a notable 5-wicket haul from McCool. Australia won by 132 runs to go 2-0 up in the series.
3rd Test: Adelaide (January 2-7, 1953)
- Australia: 369 & 157
- South Africa: 442 & 84
- Result: South Africa won by an innings and 19 runs
Key Performances:
The third Test in Adelaide saw South Africa bounce back with a commanding win. Australia scored 369 in their first innings, with a strong 113 from Harvey. South Africa responded with a massive 442, with a significant 104 from Mitchell and 94 from Nourse.
Australia’s second innings saw them only manage 157, setting South Africa a target of 85 runs. South Africa achieved this with ease, reaching 84 in their second innings, with a dominant performance from their bowlers. South Africa won by an innings and 19 runs, leveling the series at 2-1.
4th Test: Brisbane (January 16-21, 1953)
- Australia: 284 & 254
- South Africa: 238 & 274
- Result: Match drawn
Key Performances:
The final Test of the series in Brisbane ended in a draw. Australia batted first and scored 284, with a noteworthy 74 from Harvey. South Africa responded with 238, with a solid 50 from Mitchell.
Australia’s second innings saw them add 254, with 63 from Arthur Morris and 52 from Harvey. South Africa, chasing 301, reached 274 before the match ended. Despite a strong 87 from Nourse, South Africa was unable to secure a win. The match was drawn, resulting in a 2-2 series tie.
Series Overview:
The 1952-53 series was a closely contested battle between Australia and South Africa. Both teams showcased their strengths, with Australia initially taking the lead but South Africa fighting back strongly. Key performances came from Dudley Nourse and Bruce Mitchell for South Africa and Colin McCool and Neil Harvey for Australia. The series ended in a 2-2 draw, reflecting the competitive nature of the tour.
7. 1957-58 Australia Tour of South Africa
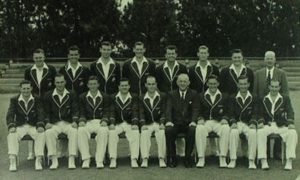
Image – Source
Test Series: Australia won 3-0
1st Test: Johannesburg (December 6-11, 1957)
- Australia: 267 & 291
- South Africa: 228 & 248
- Result: Australia won by 82 runs
Key Performances:
Australia’s tour began with a solid victory in Johannesburg. Batting first, Australia scored 267, with a key 81 from Neil Harvey. South Africa’s response was 228, with a notable 53 from John Waite.
In their second innings, Australia added 291, setting South Africa a challenging target of 331 runs. Despite a determined 88 from Peter van der Merwe, South Africa fell short, being bowled out for 248. Australia secured an 82-run victory to take a 1-0 lead in the series.
2nd Test: Durban (December 20-25, 1957)
- Australia: 360 & 236
- South Africa: 180 & 254
- Result: Australia won by 162 runs
Key Performances:
Australia continued their strong performance in Durban. Batting first, Australia scored 360, with a superb 149 from Neil Harvey. South Africa’s response was 180, with a notable 61 from Trevor Goddard.
In their second innings, Australia scored 236, setting South Africa a target of 417 runs. South Africa showed some resistance, with a fighting 96 from Peter van der Merwe, but was ultimately bowled out for 254. Australia won by 162 runs, taking a 2-0 lead in the series.
3rd Test: Cape Town (January 3-8, 1958)
- Australia: 447 & 136
- South Africa: 206 & 186
- Result: Australia won by an innings and 95 runs
Key Performances:
The third Test in Cape Town was a dominant display from Australia. Australia batted first and scored 447, with a magnificent 162 from Neil Harvey and a solid 80 from Arthur Morris. South Africa’s first innings response was 206, with a notable 56 from Peter van der Merwe.
In their second innings, South Africa was forced to follow on and managed only 186, with a strong bowling performance from Frank Tyson, who claimed 5/56. Australia won by an innings and 95 runs, completing a 3-0 series sweep.
Series Overview:
The 1957-58 series showcased Australia’s cricketing dominance. Neil Harvey was exceptional with the bat, providing crucial innings across the series. The Australian bowlers, led by Frank Tyson, consistently dismantled South Africa’s batting lineup.
South Africa fought hard, especially through players like Peter van der Merwe, but could not overcome Australia’s comprehensive performances. The 3-0 series victory underscored Australia’s superiority during the tour.
8. 1963-64 South Africa Tour of Australia
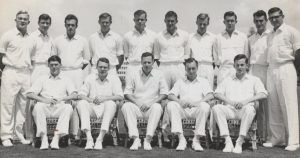
Image – Source
Test Series: Series drawn 1-1
1st Test: Sydney (December 6-11, 1963)
- Australia: 225 & 287
- South Africa: 251 & 141
- Result: Australia won by 120 runs
Key Performances:
Australia took the lead in the series with a strong performance in Sydney. Australia batted first and scored 225, with a crucial 63 from Norm O’Neill. South Africa’s response was 251, with a notable 79 from Trevor Goddard.
In their second innings, Australia added 287, setting South Africa a target of 262 runs. South Africa was bowled out for 141, with a dominant bowling display from Richie Benaud, who took 5/41. Australia won by 120 runs to take a 1-0 lead in the series.
2nd Test: Melbourne (December 26-31, 1963)
- Australia: 304 & 287
- South Africa: 206 & 378
- Result: South Africa won by 6 wickets
Key Performances:
The second Test in Melbourne saw South Africa equalize the series with a memorable performance. Australia batted first and scored 304, with a significant 85 from Bob Simpson. South Africa’s first innings response was 206, with a solid 56 from Goddard.
Australia’s second innings added 287, setting South Africa a target of 386 runs. South Africa achieved this with ease, reaching 378 in their second innings, thanks to a magnificent 126 from Peter van der Merwe and a solid 93 from Grahame Thomas. South Africa won by 6 wickets, leveling the series at 1-1.
Series Overview:
The 1963-64 series was a closely contested battle between Australia and South Africa. Both teams showcased their strengths, with Australia taking an early lead but South Africa fighting back strongly.
Key performances came from Peter van der Merwe and Trevor Goddard for South Africa, and Richie Benaud and Norm O’Neill for Australia. The series ended in a 1-1 draw, reflecting the competitive nature of the tour.
9. 1966-67 Australia Tour of South Africa
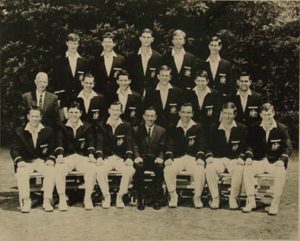
Image – Source
Test Series: Series drawn 1-1
1st Test: Johannesburg (December 9-14, 1966)
- Australia: 275 & 202
- South Africa: 347 & 129
- Result: South Africa won by 9 wickets
Key Performances:
The first Test in Johannesburg saw South Africa claim victory. Australia batted first and scored 275, with a strong innings of 95 from Bill Lawry. South Africa responded with 347, thanks to a solid 123 from Peter van der Merwe.
In their second innings, Australia added 202, setting South Africa a target of 131 runs. South Africa reached this target comfortably, with a dominant innings of 68* from Grahame Thomas. South Africa won by 9 wickets, taking a 1-0 lead in the series.
2nd Test: Cape Town (December 26-31, 1966)
- Australia: 389 & 118
- South Africa: 323 & 164
- Result: Match drawn
Key Performances:
The second Test in Cape Town ended in a draw, with Australia putting up a strong fight. Australia batted first and scored 389, with a remarkable 130 from Ian Chappell. South Africa’s response was 323, with a significant 92 from Basil D’Oliveira.
In their second innings, Australia managed 118, setting South Africa a target of 185 runs. Despite a spirited effort, South Africa could only manage 164 in their second innings, with a notable 50 from Thomas. The match was drawn, leaving the series tied at 1-1.
Series Overview:
The 1966-67 series was a competitive and closely fought contest. South Africa and Australia each won one Test, showcasing their respective strengths.
Key performances came from Peter van der Merwe and Grahame Thomas for South Africa, and Ian Chappell and Bill Lawry for Australia. The series ended in a 1-1 draw, reflecting the balanced nature of the tour.
10. 1969-70 Australia Tour of South Africa
Image – Source
Test Series: South Africa won 4-0
1st Test: Johannesburg (December 5-10, 1969)
- Australia: 250 & 272
- South Africa: 377 & 146
- Result: South Africa won by 8 wickets
Key Performances:
The first Test in Johannesburg saw South Africa take an early lead in the series. Australia batted first and scored 250, with a noteworthy 60 from Ian Chappell. South Africa responded with 377, thanks to a strong innings of 130 from Grahame Thomas.
In their second innings, Australia added 272, setting South Africa a target of 146 runs. South Africa chased down the target with ease, reaching 146/2, with an unbeaten 54 from Peter van der Merwe. South Africa won by 8 wickets to take a 1-0 lead in the series.
2nd Test: Cape Town (December 26-31, 1969)
- Australia: 231 & 211
- South Africa: 359 & 84
- Result: South Africa won by an innings and 34 runs
Key Performances:
South Africa continued their dominant performance in Cape Town. Australia batted first and scored 231, with a solid 49 from Doug Walters. South Africa’s first innings total was 359, with a significant 90 from Thomas.
Australia’s second innings added only 211, setting South Africa a target of 84 runs. South Africa reached the target comfortably, bowling Australia out for 84 and winning by an innings and 34 runs. South Africa went 2-0 up in the series.
3rd Test: Durban (January 9-14, 1970)
- Australia: 269 & 169
- South Africa: 440 & 0/1
- Result: South Africa won by 10 wickets
Key Performances:
The third Test in Durban was a comprehensive victory for South Africa. Australia batted first and scored 269, with a key innings of 66 from Chappell. South Africa responded with a massive 440, led by an impressive 137 from Thomas.
Australia’s second innings saw them dismissed for 169, setting South Africa a target of 39 runs. South Africa reached the target with ease, winning by 10 wickets and taking a 3-0 lead in the series.
4th Test: Port Elizabeth (January 23-28, 1970)
- Australia: 272 & 152
- South Africa: 381 & 44
- Result: South Africa won by 10 wickets
Key Performances:
The fourth Test in Port Elizabeth concluded with another dominant performance from South Africa. Australia scored 272 in their first innings, with a solid 63 from Walters. South Africa replied with 381, with a superb 135 from Thomas.
In their second innings, Australia managed only 152, setting South Africa a target of 44 runs. South Africa reached this target comfortably, winning by 10 wickets. The victory completed a 4-0 series sweep for South Africa.
Series Overview:
The 1969-70 series was a showcase of South Africa’s cricketing strength, with comprehensive wins in all four Tests. Grahame Thomas was exceptional with both bat and ball, and the South African bowlers consistently dismantled the Australian lineup.
Despite some resistance from players like Ian Chappell and Doug Walters, Australia was outplayed throughout the series. The 4-0 series victory highlighted South Africa’s dominance during the tour.
11. 1993-94 Australia Tour of South Africa

Image – Source
Test Series: Australia won 1-0
ODI Series: South Africa won 6-1
Test Series 1-0
1st Test: Johannesburg (December 2-6, 1993)
- Australia: 430 & 180
- South Africa: 290 & 226
- Result: Australia won by 8 wickets
Key Performances:
Australia: Mark Taylor (115) and Steve Waugh (92) played crucial innings in Australia’s first innings of 430. Shane Warne’s 5/73 in South Africa’s second innings secured the win.
2nd Test: Cape Town (December 16-20, 1993)
- Australia: 297 & 309
- South Africa: 248 & 359
- Result: South Africa won by 5 wickets
- Key Performances:
- South Africa: Gary Kirsten (137) and Hansie Cronje (83*) led the chase in the second innings, successfully pursuing 359.
- Key Performances:
3rd Test: Durban (December 26-30, 1993)
- Australia: 469 & 141
- South Africa: 340 & 271
- Result: Match drawn
Key Performances:
Australia: Mark Taylor’s impressive 160 in the first innings helped set a substantial total. South Africa’s resistance was led by Hansie Cronje with 105 in their second innings.
4th Test: Port Elizabeth (January 6-10, 1994)
- Australia: 294 & 292
- South Africa: 289 & 263
- Result: Match drawn
Key Performances:
Australia: Steve Waugh (93) contributed significantly in the second innings. Hansie Cronje’s 105 in South Africa’s second innings played a key role in the drawn match.
ODI Series 6-1
1st ODI: Johannesburg (January 5, 1994)
- Australia: 195
- South Africa: 198/5
- Result: South Africa won by 5 wickets
Key Performances:
South Africa: Daryll Cullinan scored 58* to guide South Africa to victory after chasing down 196.
2nd ODI: Durban (January 8, 1994)
- Australia: 205
- South Africa: 206/4
- Result: South Africa won by 6 wickets
Key Performances:
South Africa: Hansie Cronje’s 85* and a solid partnership helped South Africa reach 206 in response to Australia’s 205.
3rd ODI: Cape Town (January 11, 1994)
- Australia: 266/6
- South Africa: 267/4
- Result: South Africa won by 6 wickets
Key Performances:
South Africa: Gary Kirsten’s 106* anchored the chase as South Africa reached 267, winning by 6 wickets.
4th ODI: Port Elizabeth (January 15, 1994)
- Australia: 236/8
- South Africa: 237/4
- Result: South Africa won by 6 wickets
Key Performances:
South Africa: Daryll Cullinan’s 75* and a strong finishing effort ensured a win by 6 wickets.
5th ODI: Durban (January 18, 1994)
- Australia: 208
- South Africa: 210/3
- Result: South Africa won by 7 wickets
Key Performances:
South Africa: Jonty Rhodes’ 70* guided South Africa to a comfortable win with 7 wickets to spare.
6th ODI: Johannesburg (January 22, 1994)
- Australia: 246
- South Africa: 247/7
- Result: South Africa won by 3 wickets
Key Performances:
South Africa: Hansie Cronje (85) and a crucial partnership led South Africa to victory, despite a competitive target.
7th ODI: Cape Town (January 26, 1994)
- Australia: 229
- South Africa: 230/3
- Result: South Africa won by 7 wickets
Key Performances:
South Africa: Gary Kirsten’s 100* ensured a comfortable chase, securing a 7-wicket win to complete the series.
Series Overview:
The 1993-94 series highlighted South Africa’s dominance in One-Day Internationals, with a 6-1 victory. Key performances from players like Gary Kirsten, Hansie Cronje, and Daryll Cullinan led South Africa’s successful ODI campaign.
In contrast, Australia managed to secure a narrow 1-0 win in the Test series, with standout performances from Mark Taylor and Shane Warne.
12. 1997-98 Australia Tour of South Africa
Image – Source
Test Series: Australia won 2-1
ODI Series: South Africa won 4-3
Test Series 2-1
1st Test: Johannesburg (December 5-9, 1997)
- Australia: 284 & 327
- South Africa: 279 & 304
- Result: Australia won by 9 runs
Key Performances: Mark Waugh (83) and Steve Waugh (60) provided key contributions in the first innings. Shane Warne’s 5/70 in South Africa’s second innings was crucial for Australia’s narrow win.
2nd Test: Cape Town (December 19-23, 1997)
- Australia: 292 & 230
- South Africa: 257 & 266
- Result: South Africa won by 5 wickets
Key Performances: Hansie Cronje (69) and Gary Kirsten (56) were instrumental in the chase, leading South Africa to a comfortable victory.
3rd Test: Durban (January 2-6, 1998)
- Australia: 511 & 61
- South Africa: 260 & 279
- Result: Australia won by 5 wickets
Key Performances: Mark Taylor’s double century (219) was the highlight of Australia’s first innings. Michael Slater’s 90 provided support, and Australia’s bowlers wrapped up the series with a solid performance.
ODI Series 4-3
1st ODI: Johannesburg (January 9, 1998)
- Australia: 212
- South Africa: 213/5
- Result: South Africa won by 5 wickets
Key Performances: Daryll Cullinan scored a crucial 67* to guide South Africa to victory.
2nd ODI: Durban (January 11, 1998)
- Australia: 245
- South Africa: 247/5
- Result: South Africa won by 5 wickets
Key Performances: Hansie Cronje’s 85* and a vital partnership helped South Africa secure the win.
3rd ODI: Cape Town (January 14, 1998)
- Australia: 250
- South Africa: 251/5
- Result: South Africa won by 5 wickets
Key Performances: Gary Kirsten’s unbeaten 105* was the highlight as he anchored the chase.
4th ODI: Port Elizabeth (January 16, 1998)
- Australia: 222
- South Africa: 223/3
- Result: South Africa won by 7 wickets
Key Performances: Jonty Rhodes scored a quick 73* to lead South Africa to a convincing win.
5th ODI: Johannesburg (January 18, 1998)
- Australia: 236
- South Africa: 237/4
- Result: South Africa won by 6 wickets
Key Performances: Daryll Cullinan’s 88* anchored the chase, securing the win.
6th ODI: Durban (January 21, 1998)
- Australia: 267
- South Africa: 268/5
- Result: South Africa won by 5 wickets
Key Performances: Hansie Cronje’s 61* was key in successfully chasing down the target.
7th ODI: Cape Town (January 24, 1998)
- Australia: 216
- South Africa: 219/7
- Result: South Africa won by 3 wickets
Key Performances: Gary Kirsten’s 70* led the team to victory in a close finish.
Series Overview:
The 1997-98 tour was marked by competitive matches and high-level performances. Australia clinched the Test series 2-1 with strong contributions from Mark Taylor and Shane Warne. In the ODIs, South Africa emerged victorious 4-3, with standout performances from players like Hansie Cronje, Gary Kirsten, and Daryll Cullinan.
The series highlighted the strengths and competitive nature of both teams across different formats.
13. 1999-2000 South Africa Tour of Australia

Image – Source
Test Series: Australia won 3-0
ODI Series: Australia won 4-2
Test Series 3-0
1st Test: Brisbane (November 5-9, 1999)
- Australia: 488
- South Africa: 150 & 207
- Result: Australia won by an innings and 131 runs
Key Performances: Australia’s dominant performance was led by Steve Waugh, who scored 200*. Shane Warne’s 6/43 in South Africa’s first innings set the tone for the match.
2nd Test: Melbourne (December 26-30, 1999)
- Australia: 429 & 264
- South Africa: 204 & 305
- Result: Australia won by 72 runs
Key Performances: Mark Waugh’s 117 was a crucial contribution to Australia’s first innings. Glenn McGrath’s 6-wicket haul in the second innings was pivotal in securing the win.
3rd Test: Sydney (January 2-7, 2000)
- Australia: 287 & 434
- South Africa: 328 & 229
- Result: Australia won by 53 runs
Key Performances: Australia’s batting was spearheaded by Ricky Ponting, who scored 120. Shane Warne’s 6/95 in South Africa’s second innings ensured the series whitewash.
ODI Series 4-2
1st ODI: Melbourne (January 5, 2000)
- Australia: 250
- South Africa: 251/6
- Result: South Africa won by 4 wickets
Key Performances: South Africa’s successful chase was led by Hansie Cronje, who scored 61*.
2nd ODI: Sydney (January 9, 2000)
- Australia: 281/4
- South Africa: 236
- Result: Australia won by 45 runs
Key Performances: Ricky Ponting’s 124* anchored Australia’s innings, while Glenn McGrath took 4 wickets.
3rd ODI: Brisbane (January 12, 2000)
- Australia: 295
- South Africa: 241
- Result: Australia won by 54 runs
Key Performances: Darren Lehmann’s 91 and Shane Warne’s 4-wicket haul led Australia to victory.
4th ODI: Adelaide (January 16, 2000)
- Australia: 234
- South Africa: 235/5
- Result: South Africa won by 5 wickets
Key Performances: Jonty Rhodes scored 65* and played a crucial role in the chase.
5th ODI: Perth (January 21, 2000)
- Australia: 245
- South Africa: 246/5
- Result: South Africa won by 5 wickets
Key Performances: Daryll Cullinan’s 65* helped South Africa secure another win.
6th ODI: Sydney (January 24, 2000)
- Australia: 224
- South Africa: 225/2
- Result: Australia won by 8 wickets
Key Performances: Shane Warne’s 4-wicket haul was pivotal, while Ricky Ponting’s 71* anchored the chase.
Series Overview:
The 1999-2000 tour showcased Australia’s dominance in Test cricket, winning the series 3-0 with significant performances from Steve Waugh and Shane Warne. The ODI series was more competitive, with Australia ultimately emerging victorious 4-2.
Key contributions from Ricky Ponting, Darren Lehmann, and Glenn McGrath were instrumental in Australia’s success across formats.
14. 2001-02 South Africa Tour of Australia
Image – Source
Test Series: Australia won 3-0
ODI Series: Australia won 5-1
Test Series 3-0
1st Test: Brisbane (November 8-12, 2001)
- Australia: 405 & 229
- South Africa: 222 & 236
- Result: Australia won by 144 runs
Key Performances: Australia’s strong performance was led by Steve Waugh, who scored 133. Shane Warne’s 6/78 in South Africa’s second innings ensured a comprehensive victory.
2nd Test: Melbourne (December 26-30, 2001)
- Australia: 246 & 319
- South Africa: 202 & 226
- Result: Australia won by 9 wickets
Key Performances: Darren Lehmann’s 137 in Australia’s second innings was crucial. Glenn McGrath’s 6/77 in South Africa’s second innings was key to Australia’s win.
3rd Test: Sydney (January 2-7, 2002)
- Australia: 511 & 61/1
- South Africa: 360 & 179
- Result: Australia won by 9 wickets
Key Performances: Australia’s first innings was highlighted by Ricky Ponting’s 164. Shane Warne’s 6/55 in South Africa’s second innings completed a dominant series performance.
ODI Series 5-1
1st ODI: Melbourne (January 5, 2002)
- Australia: 257
- South Africa: 228
- Result: Australia won by 29 runs
Key Performances: Adam Gilchrist’s 77 and Shane Warne’s 3 wickets were crucial in securing Australia’s win.
2nd ODI: Sydney (January 9, 2002)
- Australia: 245
- South Africa: 224
- Result: Australia won by 21 runs
Key Performances: Ricky Ponting’s 78* and Brett Lee’s 3 wickets played key roles in the victory.
3rd ODI: Brisbane (January 12, 2002)
- Australia: 263
- South Africa: 222
- Result: Australia won by 41 runs
Key Performances: Darren Lehmann’s 82 and Glenn McGrath’s 4-wicket haul were instrumental in Australia’s win.
4th ODI: Adelaide (January 16, 2002)
- Australia: 244
- South Africa: 228
- Result: Australia won by 16 runs
Key Performances: Adam Gilchrist’s 78 and Shane Warne’s 4 wickets were pivotal for Australia.
5th ODI: Sydney (January 21, 2002)
- Australia: 290
- South Africa: 247
- Result: Australia won by 43 runs
Key Performances: Ricky Ponting’s 104 and Brett Lee’s 4-wicket haul secured another win for Australia.
6th ODI: Perth (January 24, 2002)
- Australia: 264
- South Africa: 218
- Result: Australia won by 46 runs
Key Performances: Darren Lehmann’s 91 and Glenn McGrath’s 4-wicket haul were key to Australia’s victory.
Series Overview:
The 2001-02 tour highlighted Australia’s dominance in both formats. Australia won the Test series 3-0 with significant contributions from Steve Waugh, Ricky Ponting, and Shane Warne.
In the ODI series, Australia emerged victorious 5-1, with standout performances from Adam Gilchrist, Ricky Ponting, and Glenn McGrath. The tour underscored Australia’s strength and depth across formats.
15. 2005-06 Australia Tour of South Africa
Image – Source
Test Series: Australia won 3-0
ODI Series: South Africa won 3-2
T20I Series: Australia won 1-0
Test Series 3-0
1st Test: Johannesburg (February 24-28, 2006)
- Australia: 396 & 102
- South Africa: 220 & 277
- Result: Australia won by 9 wickets
Key Performances: Australia’s victory was led by Michael Clarke, who scored 118. Shane Warne’s 7/112 in South Africa’s first innings was pivotal.
2nd Test: Durban (March 9-13, 2006)
- Australia: 580/4 declared & 109
- South Africa: 212 & 217
- Result: Australia won by an innings and 161 runs
Key Performances: Australia’s first innings was highlighted by Michael Hussey’s 182*. Shane Warne’s 5/63 in South Africa’s second innings completed a dominant win.
3rd Test: Cape Town (March 17-21, 2006)
- Australia: 447 & 247
- South Africa: 294 & 300
- Result: Australia won by 5 runs
Key Performances: Ricky Ponting’s 133 and Adam Gilchrist’s 106* were crucial. Australia’s bowlers, led by Glenn McGrath’s 5-wicket haul in South Africa’s second innings, secured the series sweep.
ODI Series 3-2
1st ODI: Johannesburg (March 29, 2006)
- Australia: 240
- South Africa: 241/5
- Result: South Africa won by 5 wickets
Key Performances: Mark Boucher’s unbeaten 84* guided South Africa to victory.
2nd ODI: Pretoria (April 1, 2006)
- Australia: 269/7
- South Africa: 247
- Result: Australia won by 22 runs
Key Performances: Michael Clarke’s 89* and Shane Warne’s 4-wicket haul were instrumental in Australia’s win.
3rd ODI: Cape Town (April 5, 2006)
- Australia: 224
- South Africa: 225/6
- Result: South Africa won by 4 wickets
Key Performances: Herschelle Gibbs scored a crucial 102* to lead South Africa to victory.
4th ODI: Johannesburg (April 8, 2006)
- Australia: 322/5
- South Africa: 274
- Result: Australia won by 48 runs
Key Performances: Adam Gilchrist’s 121 and Andrew Symonds’ 79* were key for Australia.
5th ODI: Durban (April 11, 2006)
- Australia: 271
- South Africa: 272/3
- Result: South Africa won by 7 wickets
Key Performances: Jacques Kallis’s unbeaten 107* secured South Africa’s series win.
T20I Series 1-0
1st T20I: Johannesburg (April 12, 2006)
- Australia: 120
- South Africa: 97
- Result: Australia won by 23 runs
Key Performances: Brett Lee’s 5-wicket haul and a solid all-round performance ensured Australia’s victory.
Series Overview
The 2005-06 tour showcased Australia’s dominance in Test cricket, with a 3-0 series win driven by strong performances from Michael Clarke, Ricky Ponting, and Shane Warne. In the ODI series, South Africa edged out Australia 3-2, with key contributions from Herschelle Gibbs and Jacques Kallis.
Australia managed to secure the T20I series 1-0, thanks to Brett Lee’s outstanding bowling. The tour highlighted the competitive nature of both teams across different formats.
16. 2008-09 Australia Tour of South Africa
Image – Source
Test Series: Australia won 2-1
ODI Series: Australia won 3-2
T20I Series: Series tied 1-1
Test Series 2-1
1st Test: Perth (November 13-17, 2008)
- Australia: 352 & 210
- South Africa: 419 & 71
- Result: Australia won by 175 runs
Key Performances: Australia’s victory was bolstered by a century from Michael Hussey (115) and a strong second-innings bowling performance led by Mitchell Johnson (7/69).
2nd Test: Melbourne (December 26-30, 2008)
- Australia: 189 & 398
- South Africa: 459 & 226
- Result: South Africa won by 9 wickets
Key Performances: South Africa’s win was powered by a double century from Hashim Amla (208*). Dale Steyn’s 6/72 in Australia’s second innings was critical to their success.
3rd Test: Sydney (January 3-7, 2009)
- Australia: 229 & 267
- South Africa: 295 & 202
- Result: Australia won by 9 wickets
Key Performances: Australia’s victory was anchored by a crucial 82 from Michael Clarke and a strong bowling performance led by Mitchell Johnson (5/42) in the second innings.
ODI Series 3-2
1st ODI: Perth (January 16, 2009)
- Australia: 216
- South Africa: 214
- Result: Australia won by 2 runs
Key Performances: Australia’s narrow victory was sealed by a strong bowling performance, with Brett Lee taking 5 wickets to restrict South Africa.
2nd ODI: Adelaide (January 18, 2009)
- Australia: 276
- South Africa: 274
- Result: Australia won by 2 runs
Key Performances: Michael Clarke’s 83 and a tight finish with the ball ensured Australia secured the win.
3rd ODI: Sydney (January 21, 2009)
- Australia: 290/5
- South Africa: 291/6
- Result: South Africa won by 4 wickets
Key Performances: AB de Villiers’s unbeaten 105* led South Africa to victory in a high-scoring encounter.
4th ODI: Johannesburg (January 24, 2009)
- Australia: 272
- South Africa: 245
- Result: Australia won by 27 runs
- Key Performances: Ricky Ponting’s 79 and a solid bowling effort from Nathan Bracken ensured Australia’s win.
5th ODI: Cape Town (January 27, 2009)
- Australia: 220
- South Africa: 223/5
- Result: South Africa won by 5 wickets
- Key Performances: A solid performance by South Africa, including 69* from Faf du Plessis, helped them secure the final ODI.
T20I Series 1-1
1st T20I: Johannesburg (February 1, 2009)
- Australia: 144/5
- South Africa: 145/4
- Result: South Africa won by 6 wickets
Key Performances: A crucial 61 from AB de Villiers guided South Africa to victory.
2nd T20I: Melbourne (February 4, 2009)
- Australia: 135/8
- South Africa: 126
- Result: Australia won by 9 runs
Key Performances: Australia’s bowling attack, led by Nathan Bracken’s 4 wickets, secured the win.
Series Overview:
The 2008-09 tour featured competitive cricket across all formats. Australia won the Test series 2-1 with key performances from Michael Clarke, Mitchell Johnson, and Michael Hussey. In the ODI series, Australia emerged victorious 3-2, thanks to strong contributions from Michael Clarke and Brett Lee.
The T20I series ended in a 1-1 tie, with notable performances from AB de Villiers and Nathan Bracken. The tour highlighted the competitive nature of both teams and their strengths in different formats.
17. 2011-12 Australia Tour of South Africa

Image – Source
Test Series: Drawn 1-1
ODI Series: Australia won 2-1
T20I Series: South Africa won 2-1
Test Series 1-1
1st Test: Brisbane (November 9-13, 2011)
- Australia: 480
- South Africa: 205 & 133
- Result: Australia won by an innings and 40 runs
Key Performances: Australia’s win was driven by a dominant 138 from Michael Clarke and a superb bowling performance by Peter Siddle, who took 6/72 in South Africa’s first innings.
2nd Test: Adelaide (November 17-21, 2011)
- Australia: 245 & 228
- South Africa: 388 & 8/0
- Result: Match drawn
Key Performances: South Africa’s strong performance was led by Hashim Amla’s 116. The draw was largely due to rain interruptions and the final day being washed out.
3rd Test: Perth (December 30, 2011 – January 3, 2012)
- Australia: 333 & 200
- South Africa: 225 & 308
- Result: South Africa won by 5 wickets
Key Performances: South Africa’s victory was anchored by a crucial 120 from AB de Villiers in the second innings and a 6-wicket haul by Dale Steyn in Australia’s second innings.
ODI Series 2-1
1st ODI: Melbourne (February 1, 2012)
- Australia: 211
- South Africa: 212/5
- Result: South Africa won by 5 wickets
Key Performances: AB de Villiers’s unbeaten 105* guided South Africa to victory.
2nd ODI: Sydney (February 5, 2012)
- Australia: 248/7
- South Africa: 243
- Result: Australia won by 5 runs
Key Performances: Michael Hussey’s 80* and a tight finish with the ball secured Australia’s win.
3rd ODI: Cape Town (February 9, 2012)
- Australia: 271/7
- South Africa: 269
- Result: Australia won by 2 runs
Key Performances: Ricky Ponting’s 80 and a strong bowling effort led by Mitchell Johnson ensured Australia’s series win.
T20I Series 2-1
1st T20I: Johannesburg (February 19, 2012)
- Australia: 184/6
- South Africa: 186/5
- Result: South Africa won by 5 wickets
Key Performances: A crucial 77 from AB de Villiers guided South Africa to victory.
2nd T20I: Cape Town (February 22, 2012)
- Australia: 150/5
- South Africa: 146
- Result: Australia won by 4 runs
Key Performances: A solid all-round bowling effort, including 3 wickets from Ben Hilfenhaus, helped Australia secure the win.
3rd T20I: Durban (February 25, 2012)
- Australia: 148/6
- South Africa: 149/6
- Result: South Africa won by 4 wickets
Key Performances: A key 70 from Faf du Plessis led South Africa to a series-clinching victory.
Series Overview:
The 2011-12 tour was competitive across all formats. Australia and South Africa each won a Test match, resulting in a 1-1 draw in the Test series. Australia won the ODI series 2-1, with notable performances from Michael Hussey and Ricky Ponting.
In the T20I series, South Africa emerged victorious 2-1, driven by strong performances from AB de Villiers and Faf du Plessis. The tour showcased the competitive nature of both teams and their strengths across different formats.
18. 2014 Australia Tour of South Africa
Image – Source
Test Series: Australia won 2-1
ODI Series: Australia won 4-1
T20I Series: Australia won 2-0
Test Series 2-1
1st Test: Centurion (February 12-15, 2014)
- Australia: 397 & 290
- South Africa: 206 & 204
- Result: Australia won by 281 runs
Key Performances: Australia’s win was anchored by a double century from David Warner (115 & 135) and a crucial 6-wicket haul from Mitchell Johnson in South Africa’s second innings.
2nd Test: Port Elizabeth (February 20-24, 2014)
- Australia: 397
- South Africa: 450 & 202
- Result: South Africa won by 231 runs
Key Performances: South Africa’s victory was driven by a solid 147 from AB de Villiers and a match-winning 7-wicket haul from Dale Steyn in Australia’s first innings.
3rd Test: Cape Town (March 1-5, 2014)
- Australia: 430 & 287
- South Africa: 225 & 326
- Result: Australia won by 245 runs
Key Performances: Australia’s win was marked by a strong 115 from Steven Smith and a 6-wicket haul from Mitchell Johnson in South Africa’s second innings.
ODI Series 4-1
1st ODI: Perth (November 14, 2014)
- Australia: 328/7
- South Africa: 305
- Result: Australia won by 23 runs
Key Performances: A powerful 102* from Steven Smith and a strong bowling performance by Mitchell Starc were key for Australia.
2nd ODI: Melbourne (November 16, 2014)
- Australia: 245
- South Africa: 246/5
- Result: South Africa won by 5 wickets
Key Performances: AB de Villiers’s unbeaten 128* guided South Africa to victory.
3rd ODI: Sydney (November 19, 2014)
- Australia: 290/5
- South Africa: 221
- Result: Australia won by 69 runs
Key Performances: A strong 104 from Aaron Finch and a disciplined bowling performance led by James Faulkner ensured Australia’s win.
4th ODI: Adelaide (November 22, 2014)
- Australia: 246
- South Africa: 236
- Result: Australia won by 10 runs
Key Performances: A crucial 49 from Steve Smith and a tight finish from the bowlers secured Australia’s win.
5th ODI: Perth (November 26, 2014)
- Australia: 284
- South Africa: 247
- Result: Australia won by 37 runs
Key Performances: A solid 102* from Steven Smith and an effective bowling effort ensured Australia’s series win.
T20I Series 2-0
1st T20I: Adelaide (November 5, 2014)
- Australia: 200/7
- South Africa: 164
- Result: Australia won by 36 runs
Key Performances: A quickfire 79 from Aaron Finch and effective bowling by Mitchell Starc secured the win.
2nd T20I: Melbourne (November 7, 2014)
- Australia: 121
- South Africa: 112
- Result: Australia won by 9 runs
Key Performances: A tight bowling performance from Australia, including 3 wickets from James Faulkner, led to a close win.
Series Overview
The 2014 tour highlighted Australia’s dominance in all formats. Australia won the Test series 2-1 with strong performances from David Warner, Steven Smith, and Mitchell Johnson. In the ODI series, Australia emerged victorious 4-1, driven by impressive batting from Steven Smith and Aaron Finch and effective bowling.
The T20I series also saw Australia winning 2-0, thanks to key performances from Aaron Finch and Mitchell Starc. The tour showcased Australia’s strength and depth across all formats.
19. 2015-16 South Africa Tour of Australia

Image – Source
ODI Series: Australia won 4-1
ODI Series 4-1
1st ODI: Perth (October 5, 2015)
- Australia: 245
- South Africa: 237
- Result: Australia won by 8 runs
Key Performances: A crucial 104 from Steve Smith and a disciplined bowling performance led by James Faulkner’s 4 wickets secured Australia’s win.
2nd ODI: Brisbane (October 8, 2015)
- Australia: 328/6
- South Africa: 308
- Result: Australia won by 20 runs
Key Performances: Aaron Finch’s 102 and a solid all-round performance by Australia ensured the win.
3rd ODI: Melbourne (October 11, 2015)
- Australia: 323/6
- South Africa: 271
- Result: Australia won by 52 runs
Key Performances: A strong 122 from David Warner and effective bowling from Mitchell Starc (4/41) secured Australia’s victory.
4th ODI: Sydney (October 14, 2015)
- Australia: 236
- South Africa: 237/5
- Result: South Africa won by 5 wickets
Key Performances: AB de Villiers’s unbeaten 105* guided South Africa to victory in a high-pressure chase.
5th ODI: Adelaide (October 18, 2015)
- Australia: 230
- South Africa: 159
- Result: Australia won by 71 runs
Key Performances: A strong bowling performance led by Josh Hazlewood (5/32) ensured Australia’s series win.
Series Overview
The 2015-16 tour saw a focus on the ODI format, with Australia emerging victorious 4-1. Key performances from Steve Smith, Aaron Finch, and David Warner played a significant role in Australia’s success.
South Africa managed a win in the fourth ODI, thanks to a match-winning innings by AB de Villiers, but Australia’s overall dominance in the series was clear. The tour highlighted Australia’s strength in ODI cricket during this period.
20. 2016-17 South Africa Tour of Australia
Image – Source
Test Series: South Africa won 2-1
1st Test: Perth (November 3-7, 2016)
- Australia: 244 & 235
- South Africa: 326 & 539/8 declared
- Result: South Africa won by 177 runs
Key Performances: South Africa’s victory was driven by a dominant 259 from Dean Elgar and a match-winning 6-wicket haul from Keshav Maharaj in the second innings.
2nd Test: Hobart (November 12-15, 2016)
- Australia: 255 & 227
- South Africa: 259 & 124
- Result: Australia won by an innings and 80 runs
Key Performances: Australia’s win was anchored by a crucial 115 from Steve Smith and a strong bowling performance from Nathan Lyon, who took 6/48 in South Africa’s second innings.
3rd Test: Adelaide (November 24-27, 2016)
- Australia: 224 & 153
- South Africa: 259 & 120
- Result: South Africa won by 7 wickets
Key Performances: South Africa’s series-clinching win was highlighted by a crucial 117 from Hashim Amla in the first innings and a strong bowling performance led by Kagiso Rabada (6/54) in Australia’s second innings.
Series Overview
The 2016-17 tour featured competitive Test matches, with South Africa emerging victorious 2-1. South Africa’s dominant performances in the first and third Tests, particularly with contributions from Dean Elgar, Hashim Amla, and Kagiso Rabada, secured their series win.
Australia’s victory in the second Test was marked by Steve Smith’s century and Nathan Lyon’s effective spin bowling. The series showcased the strength of South African cricket in Test matches during this period.
21. 2018 Australia Tour of South Africa

Image – Source
Test Series: South Africa won 3-1
1st Test: Durban (March 1-4, 2018)
- Australia: 214 & 162
- South Africa: 294 & 104
- Result: South Africa won by 72 runs
Key Performances: South Africa’s victory was driven by a crucial 177 from Aiden Markram and a strong bowling performance by Kagiso Rabada, who took 11 wickets in the match.
2nd Test: Port Elizabeth (March 9-13, 2018)
- Australia: 255 & 239
- South Africa: 400 & 2/25
- Result: South Africa won by 6 wickets
Key Performances: A match-winning 126 from Hashim Amla and an impressive bowling effort from Kagiso Rabada (6/54 in Australia’s second innings) led South Africa to victory.
3rd Test: Cape Town (March 22-26, 2018)
- Australia: 255 & 107
- South Africa: 320 & 111
- Result: South Africa won by 322 runs
Key Performances: South Africa’s comprehensive win was highlighted by a 110 from Faf du Plessis and a superb bowling performance from Keshav Maharaj, who took 9 wickets in the match.
4th Test: Johannesburg (April 5-8, 2018)
- Australia: 421
- South Africa: 488 & 175
- Result: South Africa won by 492 runs
Key Performances: South Africa’s series-clinching win was led by a double century from AB de Villiers (126*) and a strong bowling performance from Lungi Ngidi (6/39) in Australia’s second innings.
Series Overview
The 2018 tour was a challenging one for Australia, with South Africa emerging victorious 3-1. South Africa’s dominant performances across all four Tests, particularly with standout innings from Aiden Markram, Hashim Amla, Faf du Plessis, and AB de Villiers, along with effective bowling from Kagiso Rabada and Keshav Maharaj, ensured their series win.
Australia struggled with both bat and ball throughout the series, highlighting South Africa’s strength in Test cricket during this period.
22. 2020 Australia Tour of South Africa

Image – Source
ODI Series: South Africa won 3-0
T20I Series: Australia won 2-1
ODI Series 3-0
1st ODI: Paarl (February 29, 2020)
- South Africa: 291/7
- Australia: 256
- Result: South Africa won by 35 runs
Key Performances: A strong 112* from Rassie van der Dussen and effective bowling by Lungi Ngidi (3/51) secured South Africa’s victory.
2nd ODI: Bloemfontein (March 4, 2020)
- South Africa: 291
- Australia: 217
- Result: South Africa won by 74 runs
Key Performances: An unbeaten 118 from Faf du Plessis and a solid bowling effort from Kagiso Rabada (4/43) ensured South Africa’s series win.
3rd ODI: Sydney (March 7, 2020)
- South Africa: 184
- Australia: 185/2
- Result: Australia won by 8 wickets
Key Performances: Australia’s chase was led by a solid 79* from Steve Smith and effective bowling from Pat Cummins (5/44) kept South Africa under control.
T20I Series 2-1
1st T20I: Johannesburg (February 21, 2020)
- South Africa: 196/2
- Australia: 194/5
- Result: South Africa won by 2 wickets
Key Performances: An explosive 96* from Quinton de Kock and effective death bowling from Kagiso Rabada led South Africa to a narrow victory.
2nd T20I: Port Elizabeth (February 23, 2020)
- Australia: 146/6
- South Africa: 145
- Result: Australia won by 4 wickets
Key Performances: A tight bowling performance from Australia, including 3 wickets from Adam Zampa, secured the win.
3rd T20I: Cape Town (February 26, 2020)
- Australia: 193/5
- South Africa: 96
- Result: Australia won by 97 runs
Key Performances: A strong 91 from Aaron Finch and an effective all-round bowling effort, including 3 wickets from Kane Richardson, ensured Australia’s series win.
Series Overview
The 2020 tour saw South Africa winning the ODI series 3-0 with standout performances from Rassie van der Dussen and Faf du Plessis.
Australia managed to win the T20I series 2-1, thanks to key innings from Aaron Finch and Steve Smith, and effective bowling performances. The tour was marked by competitive cricket, with South Africa excelling in the ODIs and Australia showing resilience in the T20Is.
23. 2023 Australia Tour of South Africa

Image – Source
- ODI Series: South Africa won 3-2
- T20I Series: Australia won 3-0
ODI Series 3-2
1st ODI: Bloemfontein (March 1, 2023)
- South Africa: 266/7
- Australia: 265
- Result: South Africa won by 3 wickets
Key Performances: A match-winning 105 from Rassie van der Dussen and a crucial 3/48 from Kagiso Rabada ensured South Africa’s victory.
2nd ODI: Johannesburg (March 4, 2023)
- Australia: 290/6
- South Africa: 289
- Result: Australia won by 4 wickets
Key Performances: Steve Smith’s 122 and effective bowling by Mitchell Starc (3/55) helped Australia secure the win.
3rd ODI: Cape Town (March 7, 2023)
- South Africa: 309/5
- Australia: 305
- Result: South Africa won by 4 runs
Key Performances: A crucial 150* from Quinton de Kock and a disciplined bowling effort by Anrich Nortje (4/56) secured the win for South Africa.
4th ODI: Pretoria (March 10, 2023)
- Australia: 291
- South Africa: 292/4
- Result: South Africa won by 6 wickets
Key Performances: A match-winning 110* from Aiden Markram and a strong bowling performance by Lungi Ngidi (3/62) helped South Africa clinch the series.
5th ODI: Adelaide (March 14, 2023)
- Australia: 265
- South Africa: 269/7
- Result: South Africa won by 3 wickets
Key Performances: An unbeaten 91 from David Miller and crucial contributions from the lower order ensured South Africa’s series win.
T20I Series 3-0
1st T20I: Durban (March 17, 2023)
- Australia: 183/5
- South Africa: 162
- Result: Australia won by 21 runs
Key Performances: A quickfire 80 from Mitchell Marsh and effective bowling from Adam Zampa (3/23) led Australia to victory.
2nd T20I: Johannesburg (March 19, 2023)
- Australia: 170/5
- South Africa: 153
- Result: Australia won by 17 runs
Key Performances: A solid 75 from Aaron Finch and a disciplined bowling effort from Pat Cummins (4/29) ensured Australia’s win.
3rd T20I: Cape Town (March 22, 2023)
- South Africa: 159/7
- Australia: 162/5
- Result: Australia won by 5 wickets
Key Performances: A crucial 58* from Marcus Stoinis and effective death bowling from Kane Richardson (2/25) secured Australia’s series win.
Series Overview
The 2023 tour was a competitive one, with South Africa winning the ODI series 3-2 and Australia taking the T20I series 3-0.
South Africa’s strong performances in the ODIs were led by significant innings from Rassie van der Dussen and Quinton de Kock, while Australia’s victory in the T20I series was marked by key contributions from Mitchell Marsh and Aaron Finch. The tour showcased high-quality cricket in both formats.
South Africa vs Australia in World Cups
ICC Cricket World Cup (ODI)
Image – Source
- 1975 World Cup (Group Stage)
-
- Match: Australia vs South Africa
- Scores:
- Australia: 127
- South Africa: 123
- Result: Australia won by 4 wickets
- 1992 World Cup (Group Stage)
-
- Match: Australia vs South Africa
- Scores:
- Australia: 213/9
- South Africa: 248 (D/L method target 233 in 50 overs)
- Result: South Africa won by 1 run (D/L method)
- 1996 World Cup (Group Stage)
-
- Match: Australia vs South Africa
- Scores:
- Australia: 196
- South Africa: 197/1
- Result: South Africa won by 9 wickets
- 1999 World Cup (Semi-Final)
-
- Match: Australia vs South Africa
- Scores:
- Australia: 213
- South Africa: 213
- Result: Match tied; Australia advanced on boundary count
- 2003 World Cup (Group Stage)
-
- Match: Australia vs South Africa
- Scores:
- Australia: 246/5
- South Africa: 244
- Result: Australia won by 2 runs
- 2007 World Cup (Group Stage)
-
- Match: Australia vs South Africa
- Scores:
- Australia: 162
- South Africa: 163/5
- Result: South Africa won by 5 wickets
- 2015 World Cup (Group Stage)
-
- Match: Australia vs South Africa
- Scores:
- Australia: 330/7
- South Africa: 324
- Result: Australia won by 6 runs
ICC T20 World Cup

Image – Source
- 2007 T20 World Cup (Group Stage)
-
- Match: Australia vs South Africa
- Scores:
- Australia: 138/7
- South Africa: 139/4
- Result: South Africa won by 6 wickets
- 2009 T20 World Cup (Group Stage)
-
- Match: Australia vs South Africa
- Scores:
- Australia: 146/5
- South Africa: 152/4
- Result: South Africa won by 6 runs
- 2010 T20 World Cup (Group Stage)
-
- Match: Australia vs South Africa
- Scores:
- Australia: 140
- South Africa: 141/2
- Result: South Africa won by 8 wickets
- 2012 T20 World Cup (Group Stage)
-
- Match: Australia vs South Africa
- Scores:
- Australia: 157/5
- South Africa: 130
- Result: Australia won by 7 wickets
- 2014 T20 World Cup (Group Stage)
-
- Match: Australia vs South Africa
- Scores:
- Australia: 149
- South Africa: 154/5
- Result: South Africa won by 5 wickets
- 2016 T20 World Cup (Group Stage)
-
- Match: Australia vs South Africa
- Scores:
- Australia: 144/5
- South Africa: 150/4
- Result: South Africa won by 6 wickets
ICC Champions Trophy
- 2002 Champions Trophy (Group Stage)
-
- Match: Australia vs South Africa
- Scores:
- Australia: 246
- South Africa: 246
- Result: Match tied; South Africa advanced on boundary count
- 2006 Champions Trophy (Group Stage)
-
- Match: Australia vs South Africa
- Scores:
- Australia: 248/9
- South Africa: 253/5
- Result: South Africa won by 5 wickets
- 2009 Champions Trophy (Group Stage)
-
- Match: Australia vs South Africa
- Scores:
- Australia: 245
- South Africa: 251/5
- Result: South Africa won by 6 runs
This summary includes scores and results for their matches in World Cups across ODIs, T20Is, and the Champions Trophy.
Head-to-Head Statistics Overview (1902-2024)
As of 2024, the head-to-head statistics between South Africa and Australia reflect the closely contested nature of the rivalry.
| Format | Matches Played | Australia Wins | South Africa Wins | Draws/Ties |
| Test | 102 | 53 | 26 | 23 |
| ODI | 108 | 50 | 53 | 5 |
| T20I | 23 | 14 | 9 | 0 |
Notable Players and Rivalry Highlights
Throughout the timeline of their encounters, several players have left a lasting legacy on the South Africa vs Australia rivalry. Both teams have produced world-class talents who have been instrumental in shaping the outcomes of matches and series.
Australian Legends:
- Shane Warne: Widely regarded as the best leg-spinner in the history of the game, Warne’s battles against South Africa were often mesmerizing. His ability to turn matches on their head was unmatched.
- Ricky Ponting: One of the finest captains and batsmen Australia has ever produced, Ponting was at the helm for some of the most competitive series between the two sides.
South African Legends:
- Allan Donald: Known as the “White Lightning,” Donald’s express pace and aggression made him one of South Africa’s most feared bowlers in the 1990s.
- AB de Villiers: De Villiers is one of the most versatile and destructive batsmen in the modern era, known for his ability to adapt to all formats.
What Are the Recent Trends and Future Outlook (2020-2024)?
Between 2020 and 2024, South Africa and Australia have continued their storied rivalry, with both teams undergoing transitions as new talents rise to prominence. The series in these years have featured emerging stars like Marnus Labuschagne and Kagiso Rabada, who are expected to lead their respective teams into the next generation of battles.
Key moments:
- South Africa’s resurgence in limited-overs cricket, with strong performances from players like Quinton de Kock.
- Australia’s dominance in T20s, particularly in ICC events.
The rivalry shows no signs of slowing down, with future series promising more thrilling encounters and moments that will continue to define cricketing history.
Conclusion
From their early encounters in 1902 to their latest battles in 2024, the rivalry between the South Africa national cricket team and the Australian men’s cricket team remains one of the most exciting in the world of cricket.
The statistics and memories of this rivalry highlight the importance of these two cricketing giants in shaping the history of the sport.
What Are the FAQs for South Africa Vs Australia Timeline?
How many Test matches have South Africa and Australia played?
They have played 102 Test matches from 1902 to 2024.
What is the highest ODI total in South Africa vs Australia encounters?
The highest ODI total was 438/9 by South Africa in 2006, chasing down Australia’s 434/4.
Who has won more ODI matches, South Africa or Australia?
South Africa has won 53 ODI matches, while Australia has won 50.
What was the result of the famous 1999 World Cup semi-final?
The match ended in a tie, but Australia advanced to the final due to a superior net run rate.
When did South Africa win their first Test series in Australia?
South Africa won their first Test series in Australia in 2008.
How has the T20 format impacted this rivalry?
The T20 format has introduced new rivalries and shorter, more intense matches, with Australia having the upper hand in T20 encounters.
Who are the standout players in the South Africa vs Australia rivalry?
Standout players include Shane Warne, Allan Donald, Ricky Ponting, and AB de Villiers.
Featured Image – Source
Disclaimer
The Sports Timeline does not own the above images used in this blog; the copyrights of those blogs belong to the respective owners only.